Communication
- How To Create A Broadcast Group And Send A Message In CrownSIS
- How To Set Up An Email Server In CrownSIS For Sending Messages
How To Create A Broadcast Group And Send A Message In CrownSIS
Creating a broadcast group in CrownSIS allows you to send messages to multiple users simultaneously, streamlining communication within your school management system. Here’s a step-by-step guide on how to create a group and send a message to that group.
Step 1: Create a Broadcast Group
-
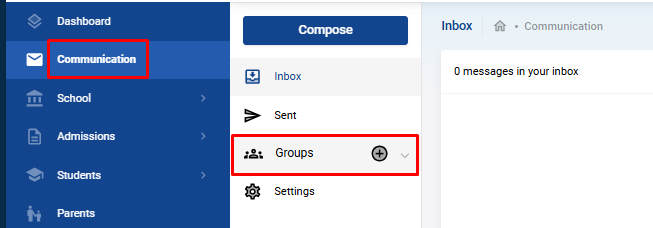
Access the Communication Section:
- Log in to your CrownSIS account.
- From the left navigation bar, click on Communication.
- Select Groups from the options.
-
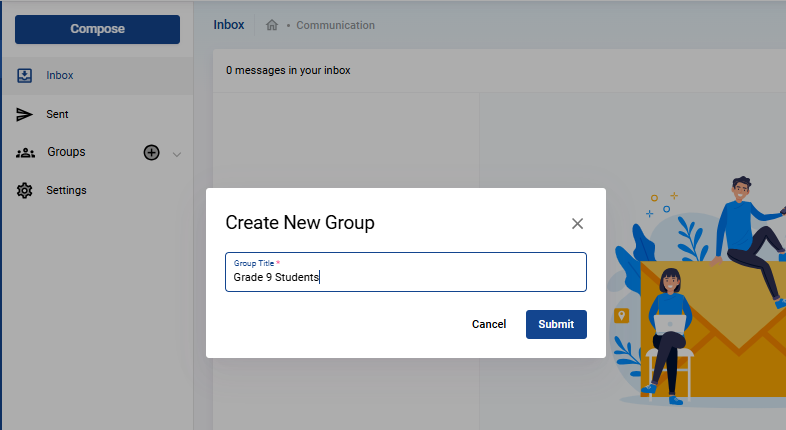
Create a New Group:
- A modal window will open where you need to enter the Group Name.
- Click Submit to create the group name.
-
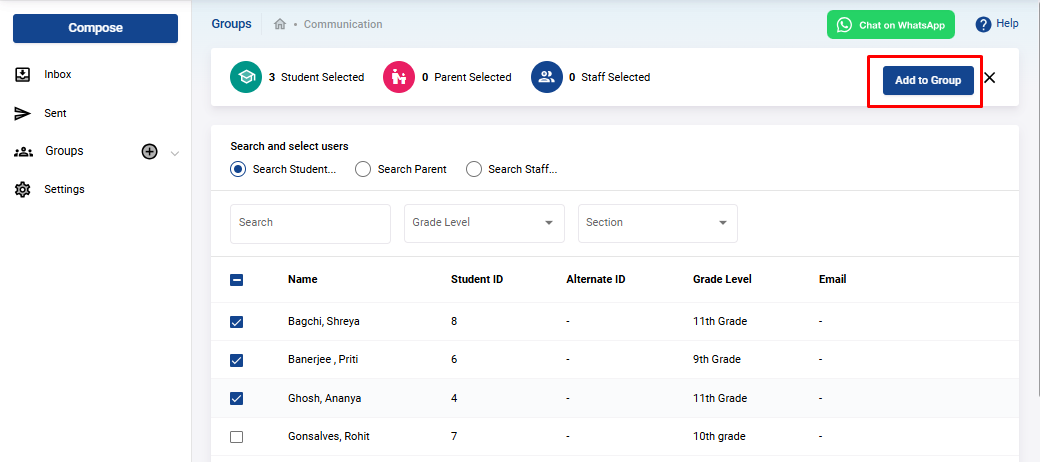
Add Members to the Group:
- After creating the group, the next step is to add members.
- You will be presented with a list of students, parents, and staff.
- Use the filters to locate specific users and allocate them to the group.
- Once you’ve selected all the desired members, click Submit to finalize the group.
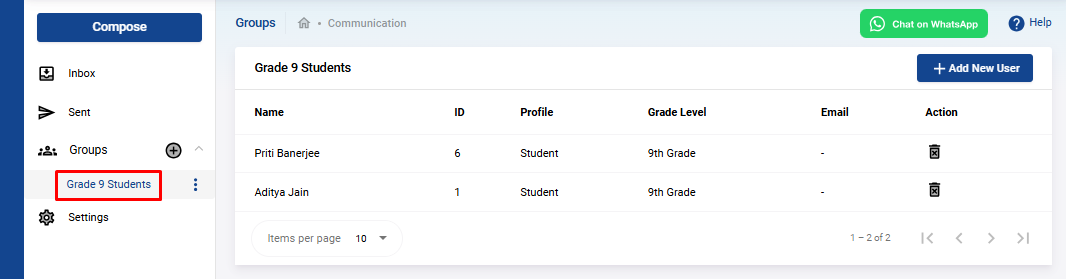
- Your group is now successfully created and will be listed under the Groups section.
Step 2: Send a Message to the Group
-
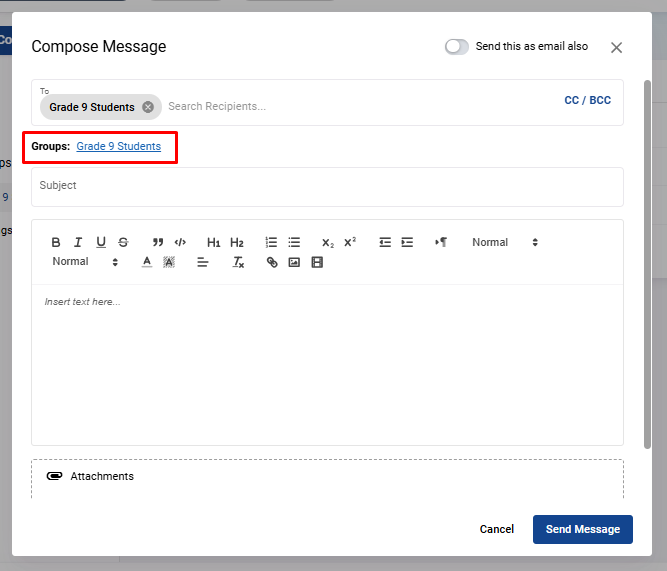
Compose a Message:
- In the Communication section, click on Compose.
- Under the To field, you will see a list of the groups you’ve created.
- Select the group you wish to send the message to.
-
Write the Message:
- Enter the Subject of the message.
- Compose the Description or body of the message.
- If needed, you can upload any relevant files to attach to the message.
-
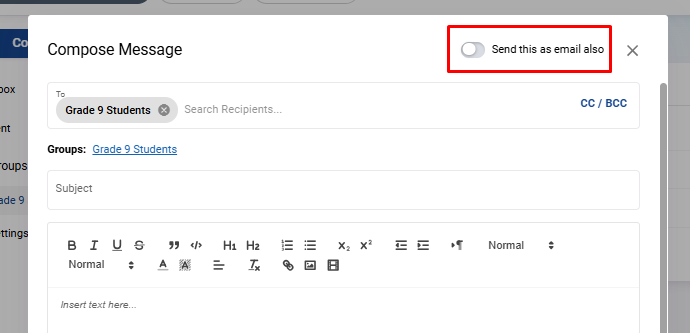
Send as Email (Optional):
- If you wish to send the message as an email, toggle the button located at the top right corner.
-
Send the Message:
- Click on Send Message , and the message will be sent to all members in the group.
By following these steps, you can efficiently manage group communications within CrownSIS, ensuring that important messages reach the right audience quickly and effectively.
How To Set Up An Email Server In CrownSIS For Sending Messages
Setting up an email server in CrownSIS is essential for sending notifications, alerts, and other important communications to users directly via email. CrownSIS offers two methods to set up the email server: SMTP relay server and API. Below are the steps to configure the email server using either method.
Step 1: Access the Communication Settings
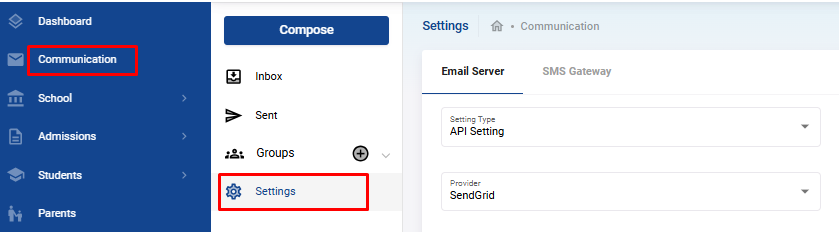
- Log in to your CrownSIS account.
- From the left navigation bar, click on Communication.
- In the Communication section, click on Settings.
Step 2: Choose Your Email Server Setup Method
In the Settings page, you will see options to configure the email server either via SMTP relay server or API.
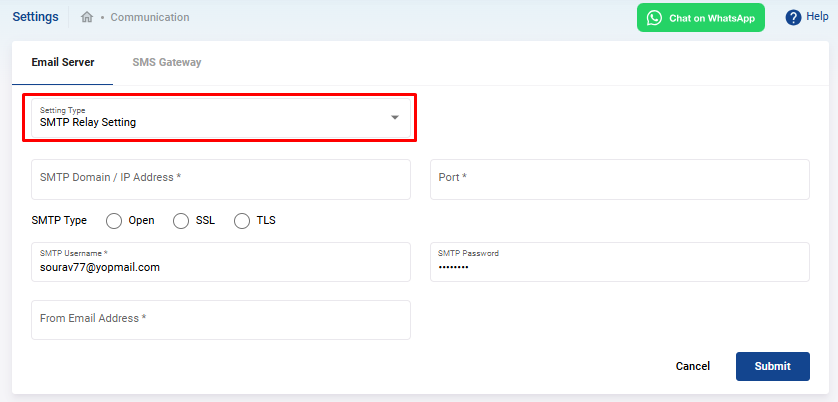
Option 1: Setting Up via SMTP Relay Server
- IP Address : Enter the IP address of your SMTP server.
- Port : Specify the port number for your SMTP server. Common port numbers are 25, 465, or 587.
- SMTP Type : Choose the SMTP type (e.g., SSL/TLS) based on your server's configuration.
- Server Username : Provide the username used to authenticate with the SMTP server.
- Password : Enter the corresponding password for the SMTP server.
- From Email Address : Specify the email address that will appear as the sender of the email.
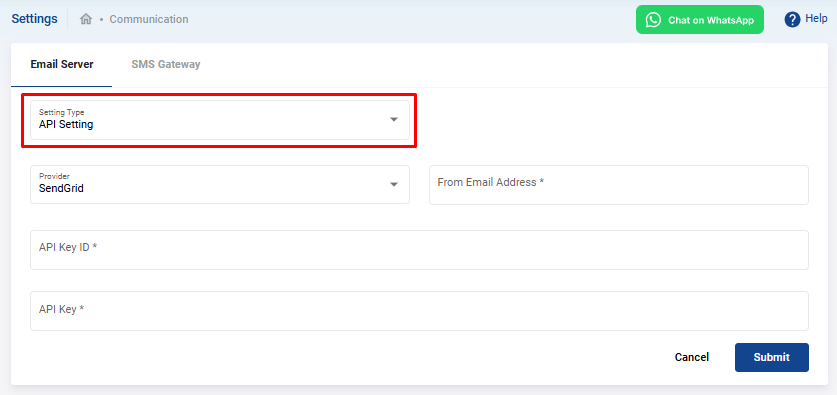
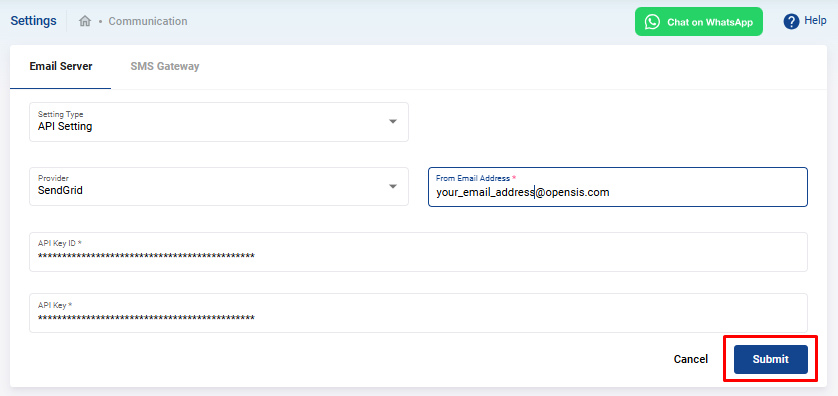
Option 2: Setting Up via API
- Service Provider : Select your email service provider (e.g., SendGrid, Mailgun, etc.).
- From Email Address : Enter the email address that will appear as the sender of the email.
- API ID : Input the API ID provided by your email service provider.
- API Key : Enter the API key associated with your service provider account.
Step 3: Finalize the Setup
Once all the required information is filled in, review the details, and click on the Submit button to save the configuration.
Congratulations! Your email server is now set up in CrownSIS, and you can start sending messages to users via email.