Admin Works On Behalf Of A Teacher
- How To Add Or Edit Gradebook Grades On Behalf Of Teachers
- How To Generate Course Progress Reports On Behalf Of Teachers
- How To Input Final Grades On Behalf Of Teachers
- How To Take Attendance On Behalf Of Teachers
- How To Take Missing Attendances On Behalf Of Teachers
How To Add Or Edit Gradebook Grades On Behalf Of Teachers
In CrownSIS, administrators have the ability to manage various teacher functions, including editing gradebook grades for students. This article guides you through the process of accessing and managing gradebook grades for a selected teacher.
Step 1: Access the Teacher Functions
- Log in to your CrownSIS account as an administrator.
- From the navigation menu, go to Staff.
- In the left submenu, select Teacher Functions.
Step 2: Access Gradebook Grades
- Under Teacher Functions, click on Gradebook Grades.
- A list of teachers will appear. Select the teacher whose gradebook you wish to manage.

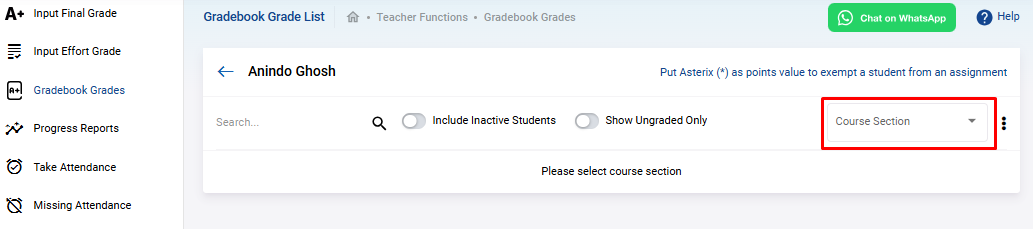
Step 3: Select the Course Section
- After selecting the teacher, choose the Course Section for which you want to view and edit the gradebook grades.
- The system will display a list of students enrolled in that course section along with the assignments they were given and the grades they received.
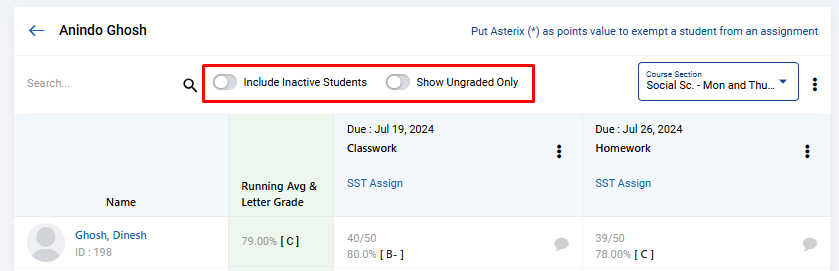
Step 4: Customize the Gradebook View
- Show Ungraded Only : If you want to view only the ungraded assignments, switch on the Show Ungraded Only toggle.
- Include Inactive Students : To include inactive students in the gradebook view, switch on the Include Inactive Students toggle.
Step 5: Edit Grades
- To edit a student's grade for an assignment, click on the three dots next to the assignment.
- Select the Edit Grade option. The gradebook will enter an editable mode.
- Enter the new grade and click Submit to save the changes.
By following these steps, administrators can effectively manage gradebook grades for teachers in CrownSIS, ensuring that student records are accurate and up-to-date.
How To Generate Course Progress Reports On Behalf Of Teachers
As an administrator in CrownSIS, managing teacher functions, particularly the generation of progress reports, is a crucial responsibility. These reports help track student performance and provide valuable insights for both teachers and parents. Here's a step-by-step guide on how to manage the Progress Reports function within the Teacher Functions section of CrownSIS.
Step 1: Accessing Teacher Functions
To manage the Progress Reports for teachers, follow these steps:
This will bring up a list of students for whom you can generate progress reports.
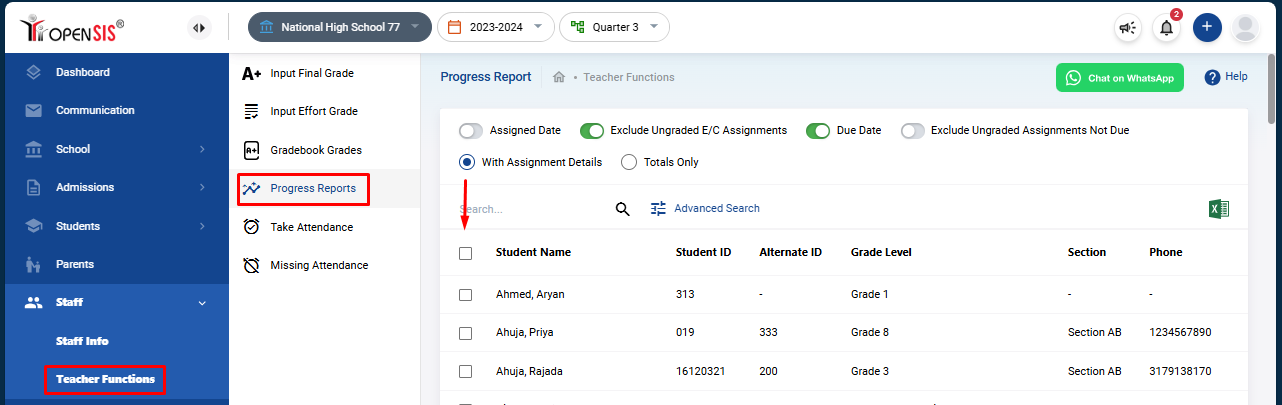
Step 2: Selecting Students
After accessing the Progress Reports section, you'll see a list of students. You need to select the students for whom you want to generate the progress reports. You can select multiple students at once based on your needs.
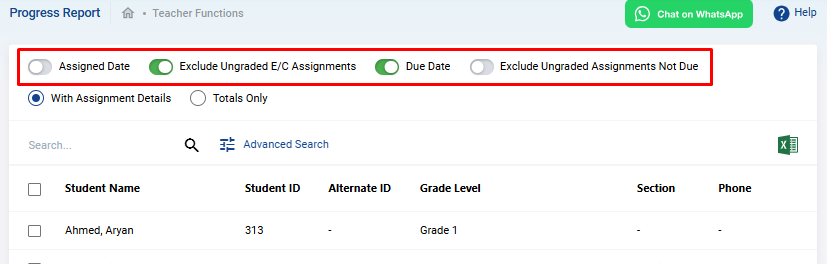
Step 3: Customizing the Progress Report
CrownSIS provides several options to customize the progress reports according to your requirements:
-
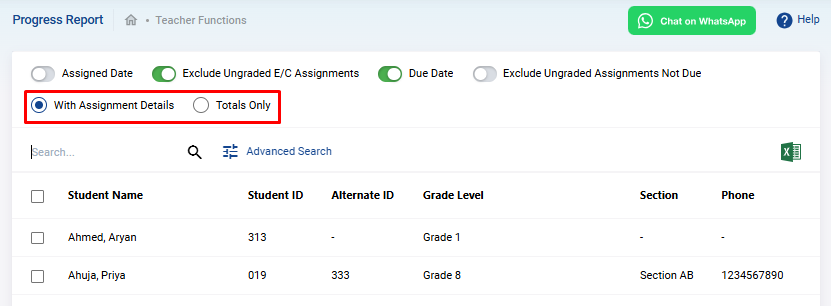
Format Selection :
- With Assignment Details : This format will include the details of each assignment within the course sections the student is studying. It will show progress on each assignment that the teacher has assigned.
- Totals Only : This format provides a summary of the total progress for each course section, without displaying individual assignment details.
-
Additional Customization Options :
- Assigned Date : If you select the "With Assignment Details" format, you can choose to include the date when each assignment was assigned.
- Exclude Ungraded E/C Assignments : This option allows you to exclude assignments that haven't been graded but whose due date has passed, ensuring they aren't counted in the overall progress.
- Due Date : This option, available with the "With Assignment Details" format, lets you display the due date for each assignment.
- Exclude Ungraded Assignments Not Due : This option excludes assignments that are ungraded and not yet due from the overall progress calculation.
These switches enable you to tailor the progress report to meet specific educational needs.
Step 4: Generating the Progress Reports
After customizing the report using the available options, you need to select the students and click on "Create Progress Reports for Selected Students". This will generate the progress reports based on the selected options and students.

Step 5: Reviewing and Distributing the Reports
Once the reports are generated, review them to ensure they align with your expectations. You can then distribute the reports to students, parents, or other relevant stakeholders.
By following these steps, administrators can efficiently manage the Progress Reports function within the Teacher Functions section of CrownSIS, ensuring that student performance is accurately tracked and reported.
How To Input Final Grades On Behalf Of Teachers
An Administrator can input Final Grades on behalf of a teacher. To perform this task go to Staff >> Teacher Functions >> Input Final Grades. You can search for a teacher or select one from the list. Click on the teacher's name and the grades input screen will open up.
First select the appropriate Course Section and the Marking Period.
If the teacher has been giving assignments and grading them, then you can click the Get Gradebook Grades button. The system will fetch the gradebook grades and calculate it properly based on weightage (if it is configured). You can choose between letter grade or percentage grade by sliding the toggle switch.
You will notice that the Credit Hour column is prepopulated and is in editable mode. This means that you can adjust the credit hours for students in a course. There are cases when a teacher does not want to award the full credit hour to a student and for those cases, you can edit the hour.
You can add predefined comments for the course or add custom comments. Once completed, click the Submit button to finalize the grades. These grades will show up on the report card and finally on the transcript.
How To Take Attendance On Behalf Of Teachers
If a Teacher has not taken attendance, then an Administrator can take the attendance on behalf of the teacher. This guide will walk you through the process of taking attendance on behalf of a teacher using CrownSIS.
Step 1: Accessing Teacher Functions
To begin, follow these steps to access the Take Attendance function:
This will display a list of teachers for whom you can take attendance.
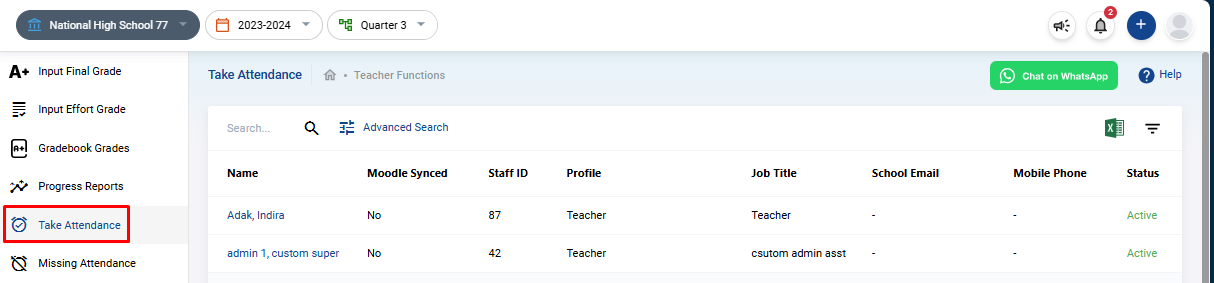
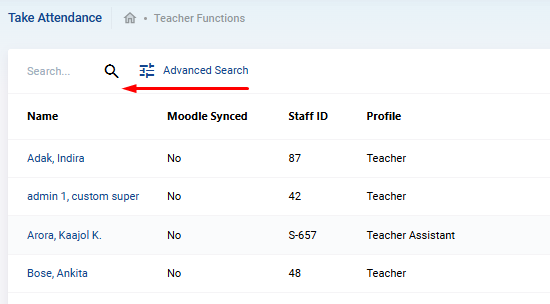
Step 2: Selecting the Teacher
After accessing the Take Attendance section, you’ll see a list of teachers. Choose the teacher for whom you wish to take attendance. This will bring up a calendar view that records the course sections taught by the selected teacher, organized by date.
Step 3: Selecting a Course Section
On the right-hand side of the calendar, you'll have the option to select a course section for which you wish to take attendance. You can navigate through the calendar using the arrows at the top to change the month and view different schedules.
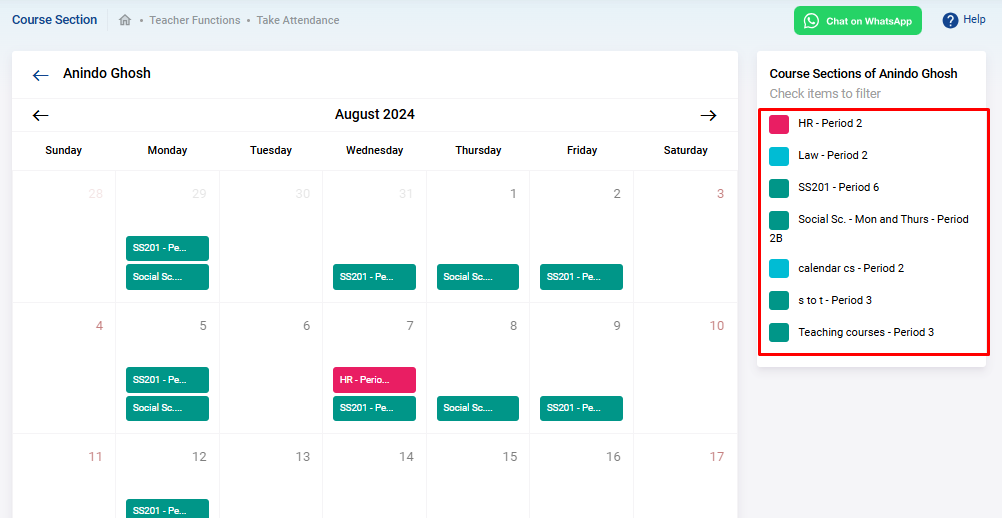
Once you've located the desired course section on the required date, click on the course section button. This will bring up a list of students enrolled in that course section.
Step 4: Recording Attendance
You will now see a list of students enrolled in the selected course section. For each student, you need to select the appropriate attendance status from the following options:
- Present
- Absent
- Half Day
- Medical Leave
- Excused Absence
- Unexcused Absence
After you’ve recorded the attendance for all students, click Submit to save the entry.

Step 5: Reviewing and Finalizing Attendance
Once you've submitted the attendance, it will be recorded for the selected course section and teacher. You can review the attendance records at any time to ensure accuracy and make any necessary adjustments.
By following these steps, administrators can efficiently manage the attendance-taking process on behalf of teachers in CrownSIS, ensuring that student attendance records are up-to-date and accurately maintained.
How To Take Missing Attendances On Behalf Of Teachers
If teachers have forgotten to take attendance for a day, missing attendance notification will be generated for the teachers and the administrator. On the administrator's dashboard there will be a missing attendance notification. Clicking on it will take the administrator to the list of teachers who have missing attendances.
A sample screenshot is given below. This screen can be accessed by the administrator by going to Attendance >>Missing Attendance menu also.
You can select any date range within the school year to find if there are any missing attendances. Once the list is generated, under the Actions menu, click on the timepiece icon to take view the periods with missing attendances.
Below is a sample screenshot of the list of individual periods were attendance was not taken by the teacher. Under the Take Attendance column, click on the icon to take attendance.
Once the attendance marking screen opens, take attendance as usual. Remember to clickSubmit to save the records.